
Introduction
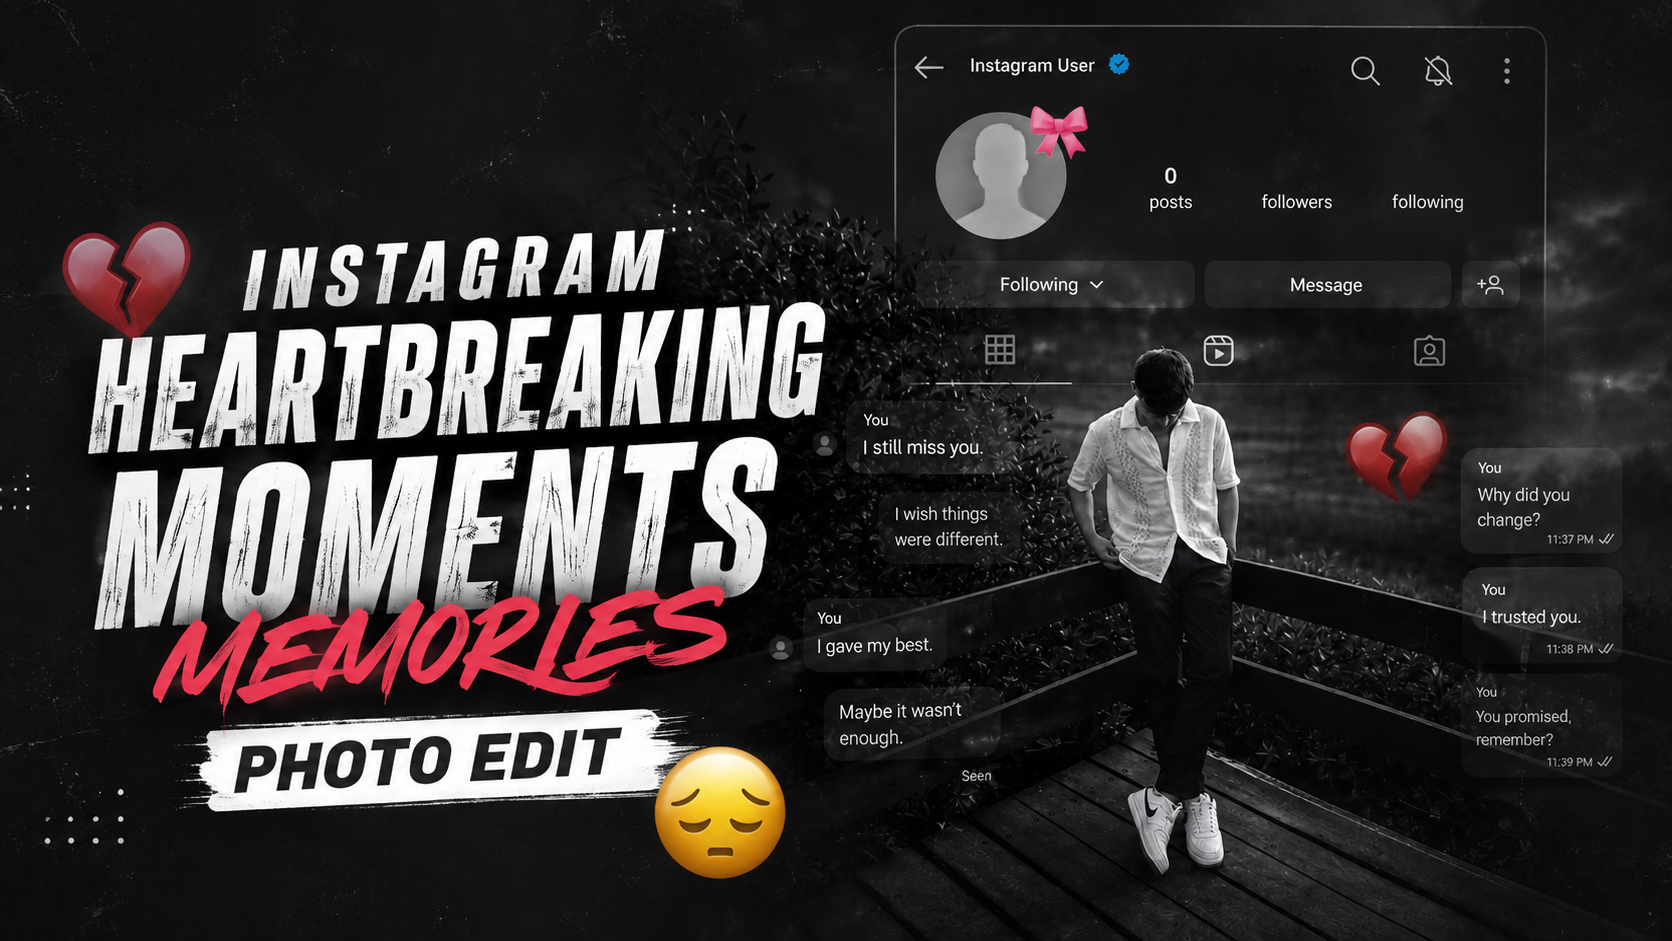
AI photo editing has made it easy to create creative, story-based images from an ordinary portrait. One style that works particularly well for emotional content is a heartbreak memories photo, where a portrait is combined with a dark background, nostalgic messages, soft lighting and subtle emotional elements.
The idea is simple: take a clear portrait and place it inside a fictional social-media-inspired memory scene. The result can be used as a personal creative project, social-media post or visual storytelling concept.
In this guide, you’ll learn how to create this type of image with an AI image editor using a reference image and a detailed prompt.
What Is a Heartbreak Memories AI Photo?
A heartbreak memories edit is a cinematic photo composition designed around the theme of memories after a relationship ends.
Instead of simply changing the background of a portrait, the edit combines several visual elements, such as:
- A dark or softly blurred background
- A portrait as the main subject
- Faded message or memory elements
- Subtle broken-heart graphics
- Low-saturation cinematic lighting
- Nostalgic text
- Film grain and soft shadows
For a safer and more original design, you can use a generic social-media-style interface rather than copying the exact interface, icons or layout of a particular platform.
Why This Editing Style Works
The effectiveness of this style comes mainly from visual storytelling. A darker background and muted colours can create a reflective mood, while the portrait remains the main focus.
The combination of typography, lighting and background elements can make an ordinary portrait feel like part of a personal memory or short visual story.
You don’t need advanced photo-editing software to experiment with the effect. An AI image editor can handle much of the composition when the instructions are clear.
Main Elements of the Edit
A typical heartbreak-memory composition can include:
- Dark cinematic background
- Softly blurred environment
- Generic social-media-style profile card
- Neutral profile avatar
- Faded message elements
- Broken-heart symbol
- Subtle film grain
- Soft vignette
- Low-saturation colour grading
- Natural portrait lighting
- Clear subject separation
- Nostalgic typography
The exact combination can be changed according to the mood you want.
Heartbreak Memories AI Photo Editing Prompt
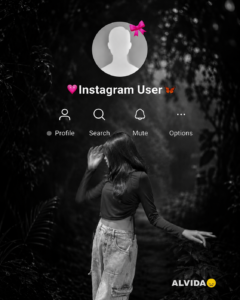
“Use the provided template image (image_4.png) as the exact layout for this edit. You must maintain the entire interface overlay, including the top circular profile icon (with the pink bow), the ‘Instagram User’ text, all interface icons, and the ‘ALVIDA ’ text in their exact original positions. Do not move, alter, or delete any of these overlay elements. Take the person from the new photo provided and place them as the large central figure, replacing the old figure. The new person must be rendered with the exact same framing (half-body or full-body) as in the input photo. Apply a cinematic ‘Black & White’ style, but ensure it is balanced and medium-dark—do not make it overly black or crushed. The subject’s face, features, and clothing must be clearly visible with natural skin tones and balanced contrast, maintaining a high-quality cinematic look without being excessively dark. The background should be a dark, cinematic forest scene, but clearly distinguishable from the subject. Most importantly, the final output must be of the highest possible resolution, crystal clear, sharp, and in Full HD. Maintain the original integrity of the subject.”
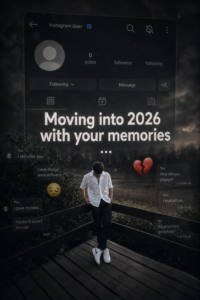
Create a dark, emotional Instagram heartbreak memories edit using the uploaded photo. Keep the person’s face, hairstyle, skin tone, body shape, clothes, and pose 100% unchanged. Do not modify identity. Design: • Background should be dark, faded, and slightly blurred. • Add a large semi-transparent Instagram profile interface behind the subject. • Profile picture should appear removed with a default Instagram avatar. • Username: “Instagram User” • Add Profile, Search, Mute, and Options icons. • Use a black and grey color theme with a soft vignette. • Add subtle film grain, motion blur, dust particles, and cinematic lighting. • Place the subject at the bottom center with a soft shadow. Text (large bold white font): “Moving into 2026 with your memories” Below the text add: … Additional effects: • Broken heart emoji • Sad emoji • Faded chat/message overlays in the background. • Instagram aesthetic, nostalgic breakup vibe. • Moody color grading with low saturation. • High contrast, realistic photo edit. • Soft glow around the subject. • Premium viral Instagram reel thumbnail style. • Ultra HD, photorealistic, 4K quality. • No cartoon, no anime, no AI-looking face. • Keep everything natural and cinematic.
How to Create the Heartbreak Memories AI Photo
You can create the image using an AI image-generation or editing tool that supports reference images.
Step 1: Choose a suitable portrait
Select a clear photo in which your face is visible. A reasonably high-resolution image with good lighting generally produces better results.
Step 2: Prepare a reference design
If you have a reference image showing the type of composition you want, upload it along with your portrait. Use the reference for general composition and mood, rather than asking the AI to reproduce a copyrighted interface exactly.
Step 3: Upload the images
Open your preferred AI image editor and upload:
- Your portrait
- Your reference image, if required
Step 4: Add the prompt
Paste the prompt provided above and explain any additional changes you want.
For example, you can ask for:
- A darker background
- Softer lighting
- Different text
- A different pose
- More or fewer memory elements
Step 5: Review the result
AI-generated images can sometimes produce incorrect text, unusual hands or inconsistent details. Check the generated image carefully before using it.
If something looks incorrect, make a smaller follow-up request instead of changing the entire prompt.
Step 6: Make the final adjustments
You can make minor adjustments to brightness, contrast, cropping and typography using a normal image editor if necessary.
Create Your Image
Tips for Better Results
Use a clear portrait
A sharp photo with a clearly visible face usually gives the AI more useful information to work with.
Keep the background simple
A complicated original background can make it harder to separate the person from the environment. A portrait with reasonable subject-background separation is preferable.
Avoid excessive effects
Too much blur, grain or darkness can hide important facial details. Keep cinematic effects subtle.
Check generated text
AI image tools can occasionally produce incorrect spelling or distorted typography. If the text is important, add it separately using an image editor after generating the image.
Try different compositions
You can experiment with the subject at the center, lower center or slightly to one side. Small composition changes can produce noticeably different results.
Why This Prompt Works
The prompt divides the editing task into separate instructions instead of describing everything with a single sentence.
It tells the AI:
- Which image should be the main subject
- What type of environment to create
- How bright or dark the image should be
- Where the subject should appear
- Which emotional elements to include
- What type of typography to use
- Which visual effects should remain subtle
It also specifically asks the tool to avoid reproducing the exact branding or interface of an existing social-media platform. This allows you to create a similar visual mood and concept while keeping the design original.
Frequently Asked Questions
1. Can I use my own photo?
Yes. A personal portrait can be used as the main reference image for this type of AI edit.
2. Which type of photo works best?
Use a clear portrait with reasonable lighting and enough visible detail around the face and clothing.
3. Can I change the background?
Yes. You can ask the AI to create a forest, street, bedroom, rainy environment or another setting that matches the mood.
4. Can I change the text?
Yes. Replace the example sentence with your own message to make the image more personal.
5. Why does AI sometimes change facial details?
AI editing does not always preserve every detail perfectly. If the face changes, try using a clearer reference image and specifically ask the tool to preserve the subject’s recognizable facial characteristics.
6. Can I use the generated image on social media?
Generally, you can use your generated image for social-media content, but you should follow the rules of the platform and any applicable rights relating to the images, people, logos or other material included in the final composition.
7. How can I improve the final quality?
Start with a high-quality source image, keep the prompt specific, check the generated result carefully and make final typography or colour adjustments with an image editor when necessary.
Conclusion
Creating a heartbreak-memory style image with AI doesn’t require advanced photo-editing skills. A clear portrait, a suitable reference and a detailed prompt can be enough to create a cinematic composition with a dark, nostalgic atmosphere.
For the best result, focus on natural lighting, readable typography and a balanced composition rather than adding too many effects. You can also change the background, message and colour grading to create a design that feels more personal and original.
Tip: If you’re publishing this article on your website, I would also replace the old “Create Your Image” ChatGPT link with a proper current tool link/button and remove phrases such as “viral,” “millions of views,” “100% unchanged,” “premium viral thumbnail,” and similar promotional claims from the article. This version is much cleaner than the original.
“Use the provided template image (image_4.png) as the exact layout for this edit. You must maintain the entire interface overlay, including the top circular profile icon (with the pink bow), the ‘Instagram User’ text, all interface icons, and the ‘ALVIDA ’ text in their exact original positions. Do not move, alter, or delete any of these overlay elements. Take the person from the new photo provided and place them as the large central figure, replacing the old figure. The new person must be rendered with the exact same framing (half-body or full-body) as in the input photo. Apply a cinematic ‘Black & White’ style, but ensure it is balanced and medium-dark—do not make it overly black or crushed. The subject’s face, features, and clothing must be clearly visible with natural skin tones and balanced contrast, maintaining a high-quality cinematic look without being excessively dark. The background should be a dark, cinematic forest scene, but clearly distinguishable from the subject. Most importantly, the final output must be of the highest possible resolution, crystal clear, sharp, and in Full HD. Maintain the original integrity of the subject.”
“Use the provided template image (image_4.png) as the exact layout for this edit. You must maintain the entire interface overlay, including the top circular profile icon (with the pink bow), the ‘Instagram User’ text, all interface icons, and the ‘ALVIDA ’ text in their exact original positions. Do not move, alter, or delete any of these overlay elements. Take the person from the new photo provided and place them as the large central figure, replacing the old figure. The new person must be rendered with the exact same framing (half-body or full-body) as in the input photo. Apply a cinematic ‘Black & White’ style, but ensure it is balanced and medium-dark—do not make it overly black or crushed. The subject’s face, features, and clothing must be clearly visible with natural skin tones and balanced contrast, maintaining a high-quality cinematic look without being excessively dark. The background should be a dark, cinematic forest scene, but clearly distinguishable from the subject. Most importantly, the final output must be of the highest possible resolution, crystal clear, sharp, and in Full HD. Maintain the original integrity of the subject.”